Today is the official start to the New Year in our household. Although celebrating the countdown on New Year’s Eve was a good start… it is not until all of the Christmas decorations are out of the house that I feel like the new year has begun.
Most years, I drag the process out as long as possible. There is just something about having a sparkly tree in my living room that makes waking up and spending time at home a little more enjoyable. If I had my way, our tree would be somewhere in the house – perfectly hidden, but perfectly visible to me – year round.
Judge if you want, but it looks like I am not the only one who feels this way!

I knew Aspen and I have always had a special connection.
😉
Now that everyone seems to be getting out of posting about the holidays, I figured I would close my series with a little DIY project.
Since getting engaged, Scott and I have wanted to send out holiday cards, but never get around to actually doing it. Every time I address a large number of envelopes, we get a handful sent back to us in the mail. No matter how many times I check addresses with the intended recipients, there are always a few that slip through the cracks, and there is a part of me that feels like I have failed. It is super disappointing!
This year, however, I put the fear aside and dedicated a few afternoons to putting our own spin on a holiday card together.
DIY Holiday Letter Christmas Card
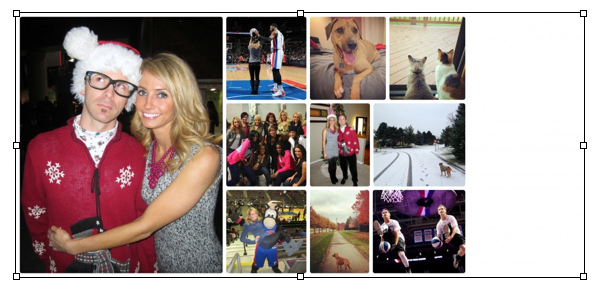
This is our first Christmas together outside of where Scott and I met and got married in Orlando, Florida. A lot of changes happened in our lives in 2012, and it was too difficult to choose just one or even a few photos to show everything we are up to in our new home and city.
Enter… the catch-up letter and photo collage!

 "Pin It")
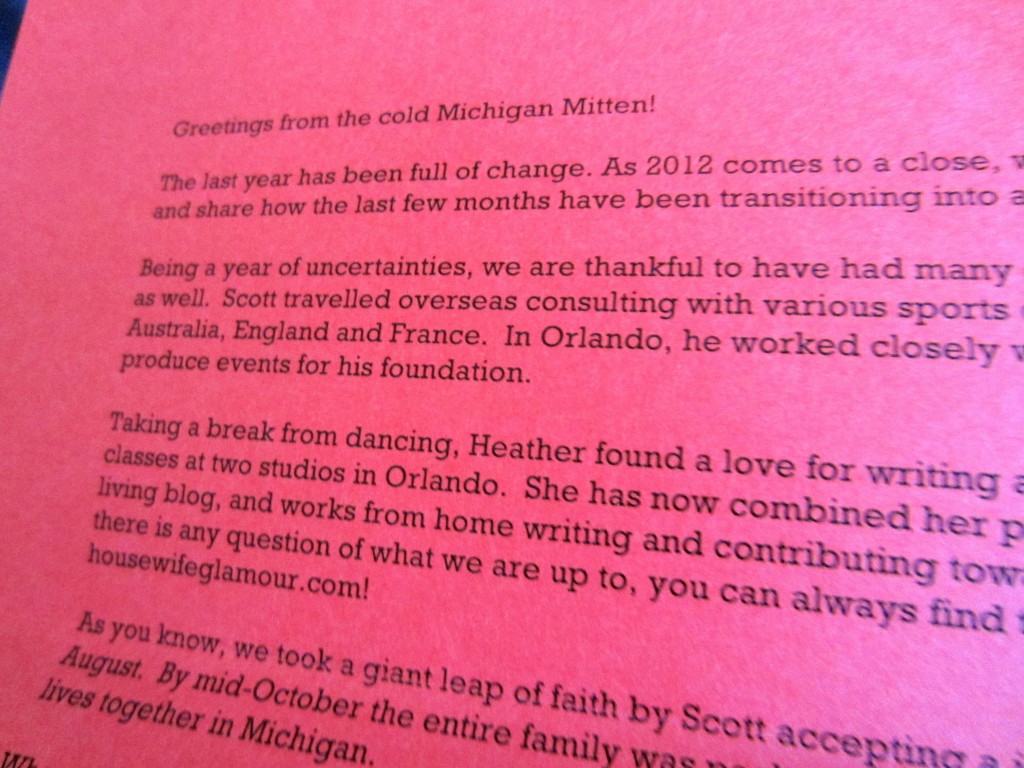
In just under a page, we typed up enough paragraphs to share our journey with collaborating photos to tell the story.
We sent out about 150 cards, and spend around $120 – including $60 just on postage alone.
What You Need
• Photo Collage – made by you, printed out at a copy store
• Holiday Letter – typed by you, printed out at a copy store
• white business envelopes – regular, or self-adhesive
• self-adhesive seals (optional)
• stamps
• time and patience
Before you get discouraged, please know that making a photo collage is easier than you think, thanks to a little friend of mine called PicMonkey.com. It is a free online photo editing website that allows you to edit photos, create collages, and add cute graphics and text.
If you are feeling a little overwhelmed… stop. Take a deep breath in, then exhale. Have some patience and you too can make your own fun holiday letter and photo collage!
Okay, are you ready to try? Let’s do it!
Step 1: Make your collage.
Before starting, I pulled handful of photos I wanted to use by dragging them to my computer desktop. This makes finding them a very easy thing to do.
I have yet to figure out how to make a collage and add text in the same place, so for this purpose I am going to explain how to do it in two steps. Let’s start with the collage.
• From the main menu on picmonkey.com, it gives you the option to Edit a Photo or Create a Collage. Click Create a Collage.
• At the top of the screen you will see the word Open, click that and select all of the photos you would like to add to the collage. You can always go back and add more if you are unsure.
• Select what layout you would like to work with on the left sidebar. There are a lot to choose from, and you can always tweak the number of photos and positions by dragging them around.
• Start dragging your uploaded photos over to the empty spaces. You can move the order and positions around, add more, and delete photos wherever you like.
I knew I wanted to add text to my collage, so I purposely added a photo to the right side of my collage, then deleted it to keep the white space available.
This is where you can also play with the coloring and edit the photos. When pleased with the positioning, name and save the photo to your desktop.
Step 2: Add text and graphics to your collage.
Now that you have the base of your photo, you can easily embellish it.
• Return to the main menu on picmonkey.com. This time click Edit a Photo.
• Upload the collage you saved to your desktop. It will pop up on the main screen.
• Take a look at the left sidebar. It is full of options to add graphics, text, and even borders to your photo.
• Around the holidays, there coordinating themes you can access as well! That is where I found the mistletoe and holiday fonts.
Take your time and enjoy the process of learning the program. After using it a few times, you will become a pro and look for any excuse to go on the site. (I do!)
Since I wanted to write a letter, I made my collage horizontal and narrow in order to fit it into a tri-fold.

• When you are pleased with your work, save the image again onto your desktop. Double-click to open it up and preview. If it looks good, go ahead and save it to a portable disk or zip drive. It would also be a good idea to save a second version as a PDF or JPG file.
Step 3: Write your letter.
• I used good ‘ol Microsoft Word to create a document. I made sure to stay on one page and choose a font that could be read on multiple computers – just in case the copy store computer did not recognize it.
• Print it off and proof read. (Trust me!)
• If everything looks good, go ahead and save it to a portable disk or zip drive. It would also be a good idea to save a second version as a PDF or JPG file.
Step 4: Print out your photo collage.
I am not one of those people who tries to print everything out on my own, using my own printer ink. If you are, by all means – go for it!
If you are not, find your nearest copy center or Fed Ex Office/Kinko’s. I promise it will be worth the trip.
Do not be afraid to ask for help when you get there! Explain exactly what you need and the staff can help you.
• Ask them to re-size your photo image to be able to fit three per page.
• Print out your now three collages to one page photo on a nice sheet of printer paper. You can choose to use photo paper, but I found a thick sheet of computer paper worked just fine and dramatically cut down on cost.

Use the paper cutter or scissors to cut the photo collages down. It is a lot easier to just get it done while you are there, instead of putting it off to do at home later.

Step 5: Print out your letter.
You can actually have this done while you are there cutting photos. Choose which paper color you would like to print on and ask them to print out however many you desire.
While a big stack of paper to fold would entertain me for a while, I asked if they could throw it in their paper folding machine and turn on the tri-fold setting. At most, this costs an extra $5.

Worth. Every. Penny.
Step 6: Assemble and seal.
I deliberately made this trip to the copy store before getting new tires put on my car. Right there in the dealership lobby, I spent a good hour putting everything together. That, my friends, is what you call using your time wisely!
Open paper, insert photo, close paper, stuff in envelope, seal.
You do not have to use envelope seals if you already have self-adhesive envelopes. I like to use these silver heart seals from JoAnn‘s.

Stuff, seal, and forget about it.

An easy way to dress it up a little.
Step 7: Sign, Stamp, Deliver.
All that is left is what you would have to do with any mail to deliver: address, stamp, and deliver.
Since we just moved, I made it easier on myself by ordering return address labels right there at Fed Ex Office. One of these days I am going to input all of my addresses into the computer so I can make labels for recipient addresses as well.

One day.
Like I said, more than a handful of these got returned to us… so if you are wondering where your holiday letter was, you might want to shares an updated address with us. 😉
Hope you and yours (for the last time this season!) had a wonderful holiday and the happiest of New Years!

Happy Holiday Letter Christmas Card making in 2013!

Leave a Reply